Easy No Bake Cheesecake Jars for Quick Desserts
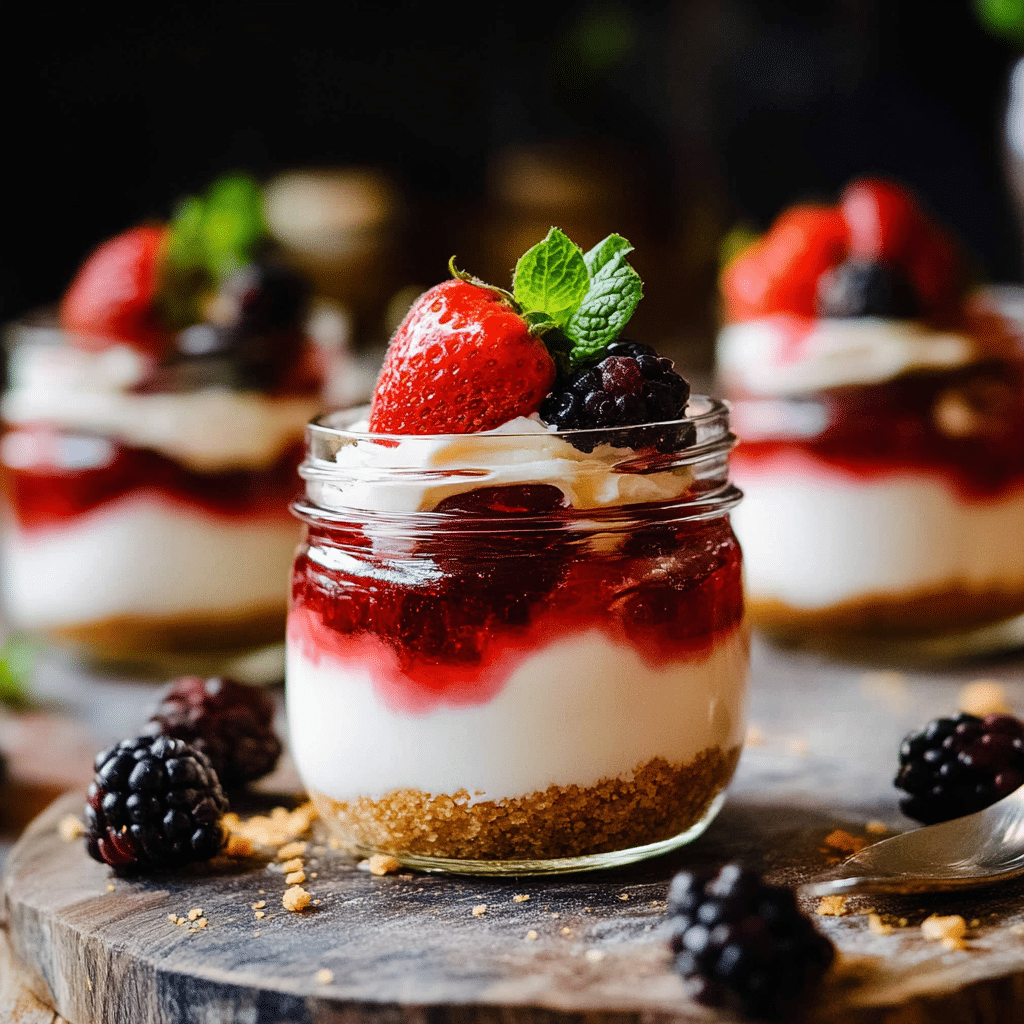
If you’re craving a sweet treat that combines creamy delight with effortless preparation, these Easy No Bake Cheesecake Jars are your new best friend. Perfect for quick desserts that need no oven time, these jars pack rich, luscious flavors and textures into a convenient, portable container. Whether you’re hosting a last-minute gathering, looking for a simple homemade gift, or just indulging in some self-care dessert moments, these jars hit the spot every time.
Why You’ll Love This Recipe
- Fast and Convenient: Ready in under 20 minutes with no baking required, perfect for busy days.
- Portable Portions: Individual jars make serving fun, easy, and mess-free for any occasion.
- Customizable Flavors: Easily adapt with your favorite toppings, fruits, or add-ins to suit your taste.
- Rich but Light: Creamy cheesecake texture without heaviness, thanks to no-bake preparation.
- Kid-Friendly Treat: Simple ingredients ensure a dessert the whole family will enjoy.
Ingredients You’ll Need
Gathering a few simple ingredients is all it takes to whip up these Easy No Bake Cheesecake Jars. Each component plays a key role in creating that perfect balance of creamy, crunchy, sweet, and tangy.
- Cream Cheese: The rich and smooth base that gives your cheesecake its signature creaminess, softened for easy mixing.
- Whipped Cream: Adds lightness and fluffiness, making the texture airy and dreamy.
- Sugar: Sweetens the cheesecake gently—granulated or powdered sugar both work well.
- Graham Cracker Crumbs: Provides the classic crunchy crust layer, adding a delightful contrast in texture.
- Butter: Melted and mixed with crumbs to hold the base together with a rich flavor.
- Vanilla Extract: Infuses a warm, fragrant note that enhances every bite.
- Fresh Fruit or Jam (optional): Offers a colorful, natural sweetness and adds freshness on top or in layers.
Variations for Easy No Bake Cheesecake Jars
Feel free to make this recipe your own! The flexible nature of Easy No Bake Cheesecake Jars invites you to experiment with flavors, textures, and toppings to match your dietary needs and taste preferences.
- Berry Bliss: Layer mixed fresh berries or berry compote for a tart twist and vibrant color.
- Chocolate Delight: Mix cocoa powder or fold in mini chocolate chips to the cheesecake mixture for a chocolatey version.
- Nutty Crunch: Add chopped nuts like pecans or almonds to the crust or as a topping for added crunch.
- Vegan Friendly: Substitute dairy cream cheese and whipped cream with coconut-based alternatives for a vegan take.
- Citrus Zest: Add lemon or orange zest to the filling for a refreshing, zesty flavor boost.

How to Make Easy No Bake Cheesecake Jars
Step 1: Prepare the Crust
Start by combining graham cracker crumbs with melted butter in a bowl until the mixture resembles damp sand. Press this crumb mixture firmly into the bottom of each jar to create a sturdy, tasty base.
Step 2: Make the Cheesecake Filling
In a separate bowl, blend softened cream cheese with sugar and vanilla extract until smooth and creamy. Gently fold in whipped cream to create a light and fluffy texture that melts in your mouth.
Step 3: Assemble the Jars
Layer the jars with the cheesecake filling over the crust. For extra flavor, add a spoonful of fruit preserves or fresh fruit between layers if desired.
Step 4: Chill to Set
Refrigerate the jars for at least 2 hours to allow the cheesecake to set properly. This step is crucial for that perfect sliceable texture without any baking required.
Step 5: Add Final Touches
Before serving, garnish with fresh fruit, chocolate shavings, or a drizzle of sauce to elevate the presentation and flavor.
Pro Tips for Making Easy No Bake Cheesecake Jars
- Use Room Temperature Cream Cheese: It blends more smoothly and prevents lumps in your filling.
- Press Crust Firmly: This helps the base hold together well and avoids crumbling when eating.
- Chill Overnight if Possible: Longer chilling deepens flavors and firms up the texture beautifully.
- Experiment with Sweeteners: Try honey or maple syrup instead of sugar for a natural sweetness.
- Choose Quality Ingredients: Rich cream cheese and fresh toppings make a noticeable difference.
How to Serve Easy No Bake Cheesecake Jars
Garnishes
Top your jars with fresh berries, mint leaves, chocolate curls, or a sprinkle of crushed nuts to add color, texture, and an inviting aroma that makes each bite more exciting.
Side Dishes
Pair the jars with light accompaniments like fresh fruit salad, a cup of herbal tea, or a handful of crispy biscotti to complement the creamy richness.
Creative Ways to Present
Serve your cheesecake jars with decorative ribbons or personalized tags for parties, or layer them in mason jars with alternating fruit and cheesecake for a stunning visual effect that wows guests.
Make Ahead and Storage
Storing Leftovers
Keep leftover Easy No Bake Cheesecake Jars tightly covered in the refrigerator for up to 3 days to maintain freshness and prevent the crust from becoming soggy.
Freezing
You can freeze the jars without fresh fruit toppings for up to 1 month. Thaw them overnight in the fridge before serving to enjoy the same creamy texture.
Reheating
Since these jars are best served chilled, reheating is not recommended. Instead, allow them to come to room temperature for about 10 minutes if they are too cold straight from the fridge.
FAQs
Can I use regular bowls instead of jars?
Absolutely! You can serve this cheesecake mixture in any small container, but jars make for great portion control and presentation.
Is it possible to make these gluten-free?
Yes, simply use gluten-free graham cracker crumbs or substitute with crushed gluten-free cookies for the crust.
How long do the jars keep in the refrigerator?
Stored properly, these cheesecake jars stay fresh for up to 3 days in the fridge without losing flavor or texture.
Can I make these vegan?
Definitely! Use dairy-free cream cheese and coconut whipped cream alternatives to create a vegan-friendly version just as delicious.
What’s the best way to sweeten the filling if I want to avoid refined sugar?
Natural sweeteners like honey, maple syrup, or agave nectar work wonderfully and add a subtle depth to the flavor.
Final Thoughts
Easy No Bake Cheesecake Jars are truly a game changer for quick and delicious desserts that impress without the fuss. Their simple ingredients and straightforward steps mean you can enjoy creamy, indulgent cheesecake anytime, whether it’s a casual weeknight or a special occasion. Give this recipe a try—you might just find your new favorite no-bake treat!
Related Posts
PrintEasy No Bake Cheesecake Jars
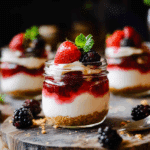
Easy No Bake Cheesecake Jars are a quick and convenient dessert option combining creamy cheesecake filling with a crunchy graham cracker crust. Ready in under 20 minutes with no baking required, these portable jars are perfect for last-minute gatherings, customizable with various toppings, and ideal for both kids and adults seeking a light, indulgent treat.
- Prep Time: 15 minutes
- Cook Time: 0 minutes
- Total Time: 2 hours 15 minutes
- Yield: 6 servings 1x
- Category: Desserts
- Method: No-Bake
- Cuisine: American
- Diet: Gluten Free (when using gluten-free graham crackers)
Ingredients
Crust
- 1 ½ cups graham cracker crumbs
- 5 tablespoons melted butter
Cheesecake Filling
- 8 oz cream cheese, softened
- ½ cup sugar (granulated or powdered)
- 1 teaspoon vanilla extract
- 1 cup whipped cream
Toppings (Optional)
- Fresh fruit or jam (as desired)
- Chocolate shavings or mini chocolate chips (optional)
- Chopped nuts (optional)
- Lemon or orange zest (optional)
Instructions
- Prepare the Crust: Combine graham cracker crumbs with melted butter in a bowl until the mixture resembles damp sand. Press this crumb mixture firmly into the bottom of each jar to create a sturdy, tasty base.
- Make the Cheesecake Filling: In a separate bowl, blend softened cream cheese with sugar and vanilla extract until smooth and creamy. Gently fold in whipped cream to create a light and fluffy texture that melts in your mouth.
- Assemble the Jars: Layer the jars with the cheesecake filling over the crust. For extra flavor, add a spoonful of fruit preserves or fresh fruit between layers if desired.
- Chill to Set: Refrigerate the jars for at least 2 hours to allow the cheesecake to set properly. This step is crucial for that perfect sliceable texture without any baking required.
- Add Final Touches: Before serving, garnish with fresh fruit, chocolate shavings, chopped nuts, or a drizzle of sauce to elevate the presentation and flavor.
Notes
- Use room temperature cream cheese for smooth blending without lumps.
- Press crust firmly into jars to prevent crumbling when eating.
- Chill overnight if possible to deepen flavors and improve texture.
- Experiment with natural sweeteners like honey or maple syrup instead of sugar.
- Choose high-quality cream cheese and fresh toppings for best results.
Nutrition
- Serving Size: 1 jar (approx. 1 cup)
- Calories: 320
- Sugar: 20g
- Sodium: 150mg
- Fat: 25g
- Saturated Fat: 15g
- Unsaturated Fat: 9g
- Trans Fat: 0g
- Carbohydrates: 18g
- Fiber: 1g
- Protein: 5g
- Cholesterol: 55mg
Keywords: no bake cheesecake, cheesecake jars, easy dessert, quick dessert, portable dessert, gluten-free dessert, kid-friendly dessert