Creamy Vanilla Bean Coconut Ice Cream Delight
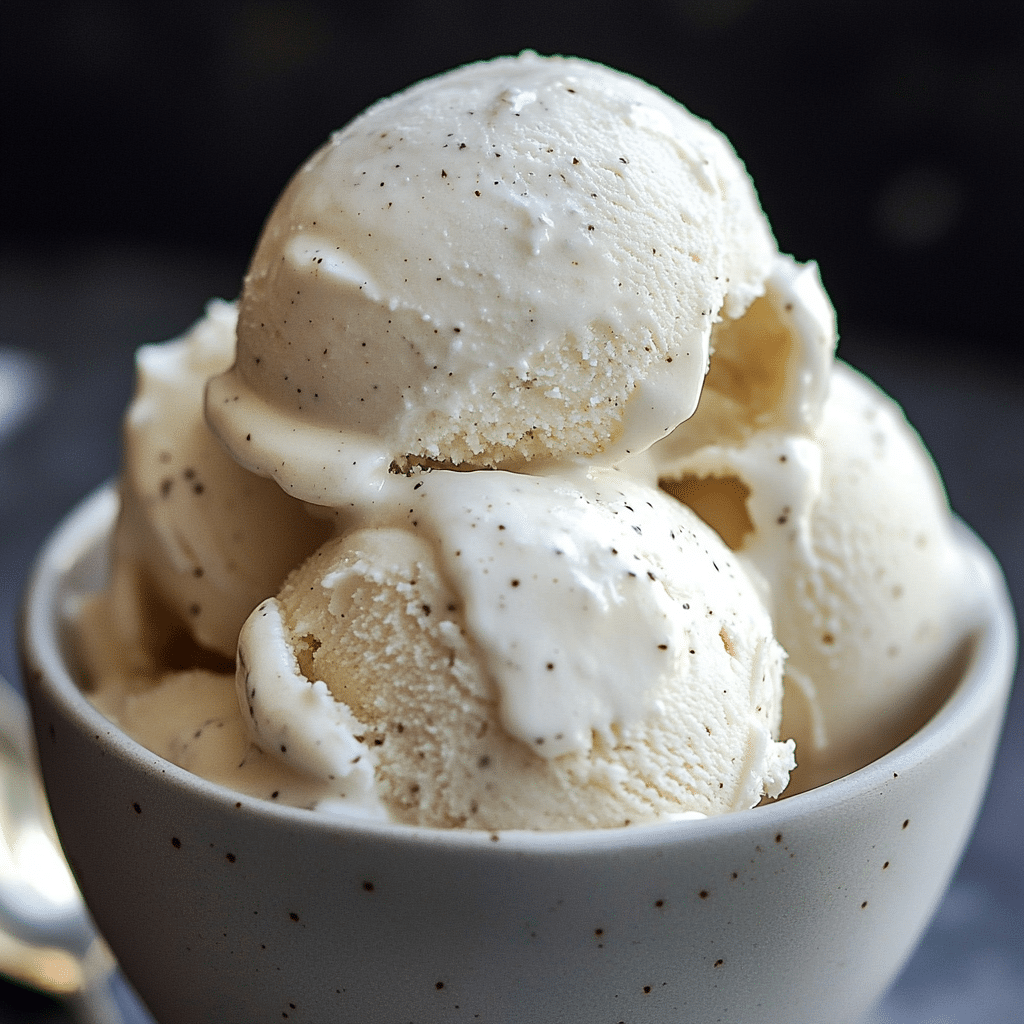
If you’re searching for a dreamy dessert that blends tropical vibes with a luscious texture, then you must try the Vanilla Bean Coconut Ice Cream. This recipe delivers a rich and creamy experience without any dairy, making it the perfect treat for anyone craving something smooth, flavorful, and refreshingly indulgent. Whether you’re vegan, lactose-intolerant, or just love coconut and vanilla, this ice cream hits every mark with its delicate balance of sweet, aromatic vanilla beans paired with the tropical creaminess of coconut milk.
Why You’ll Love This Recipe
- Dairy-Free Delight: Enjoy a creamy ice cream that’s completely free of dairy but never short on richness or taste.
- Natural Ingredients: Made with simple, wholesome ingredients that bring out pure and fresh flavors.
- Easy to Make: You only need a handful of staples and a little patience to create this homemade magic.
- Customizable Flavors: Feel free to mix in your favorite add-ins or toppings to personalize your tropical treat.
- Perfect Texture: Smooth, velvety, and just the right consistency to melt on your tongue.
Ingredients You’ll Need
This Vanilla Bean Coconut Ice Cream recipe relies on a few essential ingredients that work together beautifully for the perfect creamy texture and authentic vanilla flavor. Each component is straightforward yet crucial in crafting the ideal balance between sweetness, creaminess, and tropical aroma.
- Full-Fat Coconut Milk: The foundation of this recipe, providing creamy richness and subtle tropical flavor.
- Vanilla Bean: Using a real vanilla bean (not just extract) gives a deep, fragrant vanilla profile and lovely specks throughout your ice cream.
- Maple Syrup or Agave: A natural sweetener that balances the flavors without overpowering the vanilla or coconut.
- Lemon Juice: Adds a touch of brightness to enhance and balance the sweetness.
- Sea Salt: Just a pinch helps to bring out all the rich flavors in the ice cream.
Variations for Vanilla Bean Coconut Ice Cream
The beauty of Vanilla Bean Coconut Ice Cream lies in its versatility. It’s an easy base to tweak according to your preferences or dietary needs, so don’t hesitate to experiment with different mix-ins, sweeteners, or toppings for a unique twist on your tropical favorite.
- Chocolate Swirl: Add a ribbon of melted dark chocolate for an irresistible flavor combination.
- Berry Mix-Ins: Fold in fresh raspberries, blueberries, or chopped strawberries for a burst of fruitiness.
- Nutty Crunch: Stir in toasted almonds, macadamia nuts, or shredded coconut for added texture.
- Sweetener Swap: Substitute maple syrup with coconut sugar or honey if not strictly vegan.
- Extract Variations: Experiment with almond or coconut extract alongside vanilla bean for a layered aroma.

How to Make Vanilla Bean Coconut Ice Cream
Step 1: Prepare the Vanilla Bean
Split the vanilla bean lengthwise using a sharp knife, then scrape out the fragrant seeds carefully. These seeds are what give your ice cream those signature vanilla flecks and intense aroma, so don’t skip this step.
Step 2: Combine Ingredients
In a mixing bowl, whisk together the full-fat coconut milk, scraped vanilla bean seeds, maple syrup, lemon juice, and a pinch of sea salt until smooth and well combined. This forms the luscious base of your ice cream.
Step 3: Chill the Mixture
Cover the mixture and place it in the refrigerator for at least 2 hours or overnight. Chilling ensures the flavors meld beautifully and helps achieve a creamier texture once churned.
Step 4: Churn the Ice Cream
Pour the chilled mixture into your ice cream maker and churn according to the manufacturer’s instructions—usually around 20-25 minutes—until it thickens to a soft-serve consistency.
Step 5: Freeze Until Firm
Transfer the churned ice cream to a freezer-safe container and freeze for at least 4 hours or until firm. This step solidifies the creamy texture and makes it scoop-ready.
Pro Tips for Making Vanilla Bean Coconut Ice Cream
- Use Full-Fat Coconut Milk: It’s key to achieving that rich and creamy texture similar to traditional ice cream.
- Chill Everything: Pre-chill your mixing bowl and ice cream maker parts for best results when churning.
- Patience with Freezing: Allow enough time for the ice cream to firm up after churning to avoid icy texture.
- Scrape the Vanilla Bean Well: Use the back of your knife to get every bit of those flavorful seeds.
- Don’t Skip the Pinch of Salt: It balances sweetness and enhances the overall flavor.
How to Serve Vanilla Bean Coconut Ice Cream
Garnishes
Top your ice cream with toasted coconut flakes, fresh mint leaves, or a drizzle of dark chocolate sauce for an inviting presentation and added flavor contrast.
Side Dishes
Pair this creamy vanilla bean coconut ice cream with tropical fruits like mango slices, pineapple chunks, or papaya for a refreshing complement that enhances the island-inspired vibe.
Creative Ways to Present
Serve it in coconut shells or stylish glass bowls with edible flowers for a stunning dessert centerpiece that impresses both eyes and taste buds.
Make Ahead and Storage
Storing Leftovers
Keep your homemade Vanilla Bean Coconut Ice Cream in an airtight container in the freezer to preserve its creamy texture and rich flavor for up to two weeks.
Freezing
For best texture, freeze the ice cream at least 4 hours after churning. Avoid frequent thawing and refreezing to prevent ice crystals from forming.
Reheating
If you find your ice cream too hard to scoop, let it sit at room temperature for 5-10 minutes before serving to soften slightly without melting it completely.
FAQs
Can I use light coconut milk instead of full-fat?
Full-fat coconut milk is recommended for creaminess; light versions tend to make the ice cream icy and less smooth.
Is this recipe vegan?
Yes, as long as you use vegan sweeteners like maple syrup or agave, this Vanilla Bean Coconut Ice Cream is perfectly vegan and dairy-free.
Can I make this without an ice cream maker?
Yes, but you’ll need to stir the mixture every 30 minutes during freezing to break up ice crystals and achieve a creamy texture.
How long does homemade coconut ice cream last in the freezer?
Stored in an airtight container, it stays fresh and delicious for up to two weeks without significant texture loss.
Can I add mix-ins like nuts or chocolate chips?
Absolutely! Add your favorite mix-ins during the last 5 minutes of churning for even distribution without clumping.
Final Thoughts
If you’re ready to dive into a tropical treat that’s both refreshing and indulgent, give the Vanilla Bean Coconut Ice Cream a try. Its rich, dairy-free creaminess paired with the warm aroma of real vanilla beans will charm your taste buds and leave you craving more. So, whip up a batch and share this delightful recipe with friends and family for a scoop of happiness everyone can enjoy.
Related Posts
- Easy Chocolate Protein Pudding Recipe to Try Today
- How to Make Chocolate Chia Pudding Easily
- How to Make Watermelon Fruit Pizza Perfectly
Vanilla Bean Coconut Ice Cream
Vanilla Bean Coconut Ice Cream is a rich, creamy, dairy-free dessert that blends the aromatic sweetness of real vanilla beans with the tropical flavor of full-fat coconut milk. Perfect for vegans, those lactose-intolerant, or anyone craving a smooth, indulgent treat with natural ingredients and customizable flavors.
- Prep Time: 15 minutes
- Cook Time: 25 minutes (churning)
- Total Time: 6+ hours (including chilling and freezing)
- Yield: 4 servings 1x
- Category: Dessert
- Method: Churning
- Cuisine: Vegan
- Diet: Gluten Free, Dairy Free, Vegan
Ingredients
Ingredients
- 2 cups full-fat coconut milk
- 1 vanilla bean, split and seeds scraped
- 1/3 cup maple syrup or agave syrup
- 1 tablespoon fresh lemon juice
- Pinch of sea salt
Instructions
- Prepare the Vanilla Bean: Split the vanilla bean lengthwise using a sharp knife, then carefully scrape out the fragrant seeds. These seeds add signature vanilla flecks and an intense aroma to your ice cream.
- Combine Ingredients: In a mixing bowl, whisk together the full-fat coconut milk, scraped vanilla bean seeds, maple syrup, lemon juice, and a pinch of sea salt until smooth and well combined. This forms the luscious base of your ice cream.
- Chill the Mixture: Cover the mixture and refrigerate for at least 2 hours or overnight. Chilling helps flavors meld and ensures a creamier texture when churned.
- Churn the Ice Cream: Pour the chilled mixture into your ice cream maker and churn according to the manufacturer’s instructions, usually about 20-25 minutes, until it thickens to a soft-serve consistency.
- Freeze Until Firm: Transfer the churned ice cream to a freezer-safe container and freeze for at least 4 hours until firm and scoop-ready.
Notes
- Use full-fat coconut milk for best creamy texture.
- Pre-chill your mixing bowl and ice cream maker parts for better results.
- Allow enough freezing time after churning to prevent icy texture.
- Scrape vanilla bean seeds thoroughly to maximize flavor.
- A pinch of salt balances sweetness and enhances overall flavor.
- Customizable with mix-ins like chocolate, berries, or nuts added in last 5 minutes of churning.
Nutrition
- Serving Size: 1/2 cup (about 100g)
- Calories: 220
- Sugar: 15g
- Sodium: 40mg
- Fat: 18g
- Saturated Fat: 16g
- Unsaturated Fat: 1.5g
- Trans Fat: 0g
- Carbohydrates: 16g
- Fiber: 1g
- Protein: 2g
- Cholesterol: 0mg
Keywords: Vanilla bean coconut ice cream, dairy-free ice cream, vegan dessert, coconut milk ice cream, tropical ice cream